Dreamflow
Guide: Integrating PushFire SDK in DreamFlow for Push Notification
The pushfire_sdk uses Firebase Cloud Messaging (FCM) as its backbone to deliver notifications. This means our first priority is to get Firebase set up correctly.
Step 0: Prerequisites - Firebase Project Setup
Before you can use pushfire_sdk, you must create and connect a Firebase project. This is the backbone of your push notification system.
Step 1: Create a Firebase Project
Go to the Firebase Console.
Click "Add project".
Enter a name for your project (e.g., "MyDreamFlowApp").
Follow the on-screen steps. It's recommended to enable Google Analytics for your project.
Once your project is created, you will be taken to the project dashboard. Leave this browser tab open.
Step 0.1: Connect Firebase Within Your DreamFlow App
DreamFlow has a built-in integration that makes connecting to Firebase simple and automatic. You only need to be the owner of the project to do this.
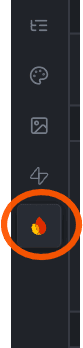
In your DreamFlow project, in the sidebar, select FIrebase.
Click the "Connect" button to link your Firebase account to DreamFlow.
A pop-up will appear. Select your google account.
Select the Firebase project you just created from the dropdown list.
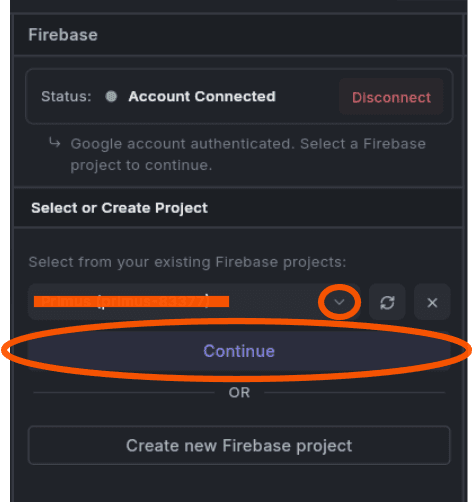
Click "Continue".
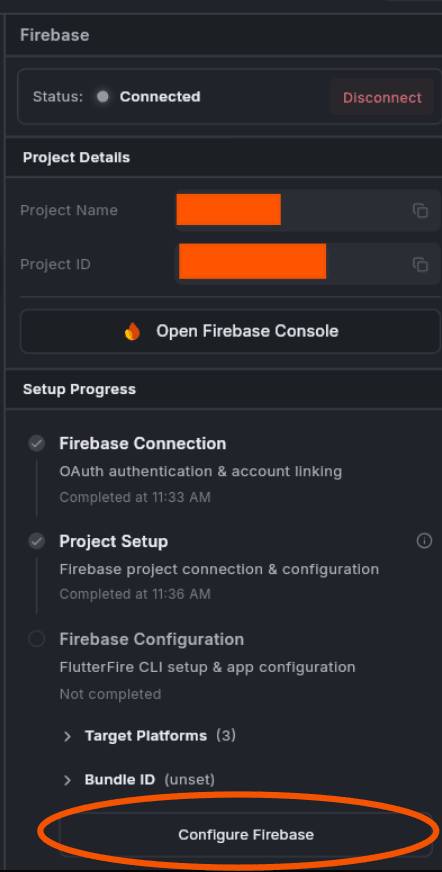
This process may take 2-5 minutes. Once it's done, you'll see a confirmation message. Then click on "Configure Firebase". DreamFlow will now automatically configure your Firebase project by:
Adding Android and iOS apps to your Firebase project.
Using your DreamFlow App's Package Name and Bundle ID.
Generating and linking the necessary configuration files (google-services.json & GoogleService-Info.plist) for you.
Two Integration Approaches
- AI-Assisted — Best for new projects and rapid prototyping (⭐ Low effort)
- Manual Post-Export — Best for existing projects and fine-tuned control (⭐⭐ Medium effort)
Approach 1: AI-Assisted Integration (Recommended)
Step 1: Add Context File to Your Project
Before prompting Dreamflow, add the llms.txt context file to your project. This file helps the AI understand how to properly integrate PushFire SDK.
- Download llms.txt from the PushFire SDK repository
- Place it in your project's root directory
- Dreamflow will automatically read it for context
Step 2: Use These Prompts with Dreamflow
🚀 Basic Integration Prompt
Copy and use this prompt when building your app with Dreamflow:
🔐 Supabase Auth Integration Prompt
If your app uses Supabase instead of Firebase:
Step 3: Review Generated Code
After Dreamflow generates the code, verify these key elements:
✅ Check pubspec.yaml
✅ Check main.dart
Step 4: Verify iOS Configuration
After Dreamflow generates the code, verify that the iOS capabilities were added correctly:
- Check ios/Runner.xcodeproj/project.pbxproj contains:
- Push Notifications capability
- Background Modes with "remote-notification"
- If testing on a real iOS device, open ios/Runner.xcworkspace in Xcode and verify:
- Signing & Capabilities shows "Push Notifications"
- Background Modes shows "Remote notifications" enabled
Approach 2: Manual Post-Export Integration
If you've already generated your app with Dreamflow and want to add PushFire afterwards:
Step 1: Export Your Dreamflow Project
- In Dreamflow, click Export → Download Flutter Project
- Extract the project to your development folder
- Open the project in VS Code or your preferred IDE
Step 2: Add PushFire SDK
Add to pubspec.yaml
Run dependency installation
Step 3: Configure Firebase (If Not Already Done)
Step 4: Initialize PushFire SDK
Edit your main.dart:
Step 5: iOS Configuration
- Open ios/Runner.xcworkspace in Xcode
- Select your project target → Signing & Capabilities
- Add Push Notifications capability
- Add Background Modes → Enable "Background processing" and "Remote notifications"
Notification Permissions
The PushFire SDK handles notification permissions automatically, but you should understand how it works for each platform.
Default Behavior
By default, the SDK automatically requests notification permissions during initialization. This is controlled by the requestNotificationPermission config option (defaults to true).
Manual Permission Request
If you want to control when permissions are requested (for better UX), disable auto-request and call manually:
Platform-Specific Notes
iOS:
- Requires Push Notifications capability in Xcode (see Step 5 above)
- Permission dialog appears when first requested
- Users can enable/disable in Settings → Your App → Notifications
Android:
- For Android 13+ (API 33+): Runtime permission is required — the SDK handles this automatically
- For Android 12 and below: No runtime permission needed, notifications work by default
- Users can manage in Settings → Apps → Your App → Notifications
Verification Steps
After integration, verify everything works:
1. Check Initialization Logs
Run your app with flutter run and look for:
2. Test Subscriber Login
If using Firebase Auth, sign in a user and verify:
3. Verify in PushFire Dashboard
Log into your PushFire dashboard and confirm:
- Device appears in registered devices
- Subscriber shows up after login